
Printable leather wallet patterns are versatile templates for crafting custom wallets. Available as free PDFs, they offer precise measurements and styling, enabling creativity and personalization.

What is a Printable Leather Wallet Pattern?
A printable leather wallet pattern is a digital template designed for crafting custom leather wallets. Typically available as a free PDF, it provides detailed layouts, measurements, and markings. These patterns guide users in cutting and assembling leather accurately. They often include multiple card slots, cash compartments, and stitching lines, making DIY wallet creation accessible. Whether for beginners or experienced crafters, printable patterns simplify the process, ensuring professional-looking results with minimal effort.
Why Use a Printable Leather Wallet Pattern?
Using a printable leather wallet pattern offers convenience, precision, and cost-effectiveness. It saves time by providing pre-designed layouts, reducing the need for measurements. Free PDF templates are widely available, making it accessible for crafters of all skill levels. These patterns ensure consistency and accuracy, minimizing waste and errors. They also allow for customization, enabling users to create unique, professional-looking wallets. Perfect for DIY enthusiasts, printable patterns simplify the crafting process while delivering high-quality results.
Benefits of DIY Leather Wallets
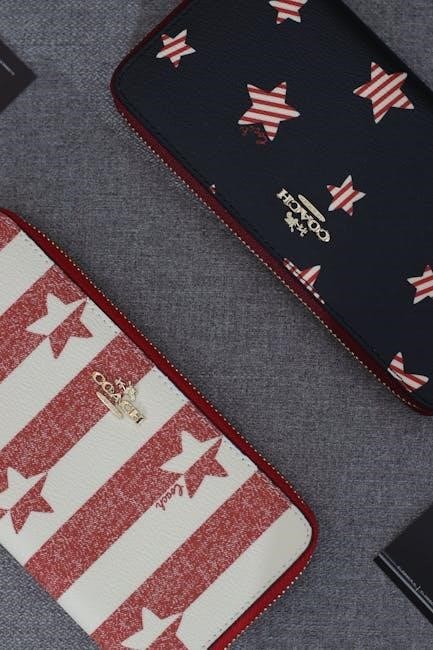
DIY leather wallets offer customization, cost-effectiveness, and a sense of accomplishment. Crafters can choose materials, designs, and features, ensuring a personalized product. This method often reduces costs compared to buying high-end wallets. It also allows for quality control, as creators can select durable materials. DIY projects foster creativity and provide an opportunity to learn new skills. Additionally, handmade wallets make unique gifts, and the process can be environmentally friendly by repurposing leftover leather. The end result is a durable, tailored accessory that reflects personal style and craftsmanship.

Materials Needed for Leather Wallet Making
Leather, thread, glue, scissors, and a sewing needle are essential. Additional materials include a ruler, cutting mat, and leather finishers for a polished look.
Types of Leather for Wallets
Full-grain leather is durable and develops a rich patina over time. Top-grain leather is strong and resistant to wear. Patent leather offers a sleek, polished look. Suede provides a soft, textured feel, while faux leather is a budget-friendly, cruelty-free option. Each type varies in thickness, finish, and suitability for different wallet styles, allowing crafters to choose based on desired appearance and functionality.
Tools Required for Cutting and Sewing
Essential tools include a sharp utility knife or leather cutter for precise cuts, a cutting mat for protection, and a ruler for straight edges. For sewing, a heavy-duty sewing machine or leather needle and waxed thread are ideal. Thimbles protect fingers during hand-stitching, while leather glue and clamps help secure pieces. A seam ripper and edge beveler are handy for adjustments and finishing touches, ensuring professional results in wallet crafting.
Adhesives and Finishing Products
Leather adhesives like contact cement are essential for bonding layers securely. Finishing products such as leather conditioner, sealant, and edge beveler enhance durability and appearance. Apply a leather finisher to protect the material and maintain its luster. Optional treatments like waterproofing sprays or wax can add extra protection. Always test products on scrap leather before applying them to your wallet to ensure compatibility and desired results.
Downloading and Printing the Pattern
Downloadable leather wallet patterns are available as free PDFs online. Print them on standard paper or cardstock for precise cutting templates. Ensure your printer settings match the pattern’s scale for accurate results.
Where to Find Free Printable Leather Wallet Patterns
Free printable leather wallet patterns are widely available online. Websites like Etsy, Pinterest, and crafting forums offer downloadable PDF templates. Search for “free leather wallet template” or “DIY wallet pattern PDF” to find options. Many platforms provide customizable designs, from simple card holders to complex bi-fold wallets. Ensure the pattern includes clear measurements and cutting guides for accuracy. Always verify the source for quality and compatibility with your printing needs.
How to Download and Save the PDF Pattern
To download and save a printable leather wallet pattern, locate the PDF link on the website. Click the “Download” button, select a save location, and ensure the file is saved as a PDF. Open the file to verify all pages and measurements are included. Make sure your device has a PDF reader installed to view and print the pattern accurately. This step ensures you have a clear template for crafting your leather wallet.
Printing Tips for Leather Wallet Patterns
For optimal results, print the PDF pattern on high-quality paper or cardstock. Ensure “Actual Size” is selected in printer settings to maintain accurate measurements. Use a matte finish for better visibility of cutting lines. Print at high DPI for crisp details. Align the pattern correctly on the leather before cutting. Consider using a laser printer for vibrant colors and sharp lines. Always double-check the printed measurements to avoid sizing errors during the crafting process.

Understanding the Pattern Layout
Understanding the pattern layout involves recognizing panels, pockets, and seams. Alignment markers and folding guides ensure precise cutting and assembly for a professional finish.
Interpreting the Pattern Measurements
Interpreting pattern measurements ensures accurate cuts and assembly. Study the dimensions, labels, and markings carefully. Double-check all lengths, widths, and angles before cutting. Use a ruler or measuring tool to verify accuracy. Pay attention to seam allowances and folding lines. Understanding these details guarantees a professional finish and proper functionality of the wallet. Always refer to the pattern’s guide for specific instructions tailored to the design.
Understanding Cutting Lines and Markings
Cutting lines and markings guide precise leather cuts. Solid lines indicate where to cut, while dashed lines mark folds or creases. Symbols may denote stitching areas or alignment points. Always identify these markings clearly before cutting to avoid errors. Use a sharp tool or cutter for clean edges. Double-check the pattern’s legend to understand specific symbols, ensuring accurate cuts and a professional finish. Proper interpretation prevents wasted material and ensures the wallet’s structural integrity.
How to Adjust the Pattern for Custom Sizes
To customize the wallet size, scale the PDF pattern using software or print it at adjusted percentages. Measure and mark desired dimensions, ensuring proportions remain balanced. Reposition elements like card slots or folds to fit the new size. Use a ruler or tracing paper to redraw lines accurately. Test the layout with paper before cutting leather to confirm functionality. This method allows for personalized fits while maintaining the wallet’s practical design and aesthetic appeal.

Cutting the Leather
Cutting leather requires sharp tools and precision. Use scissors, a craft knife, or a rotary cutter to follow pattern lines. Smooth edges with sandpaper for a polished finish.
Step-by-Step Guide to Cutting Leather
Begin by tracing the printable leather wallet pattern onto the leather using a pencil or marker. Cut along the lines with sharp tools like a rotary cutter or scissors. For straight edges, use a ruler to guide your cuts. Curved sections may require a craft knife for precision. After cutting, smooth rough edges with sandpaper. Double-check your cuts against the pattern to ensure accuracy before proceeding to assembly.
Handling Curves and Complex Shapes
Handling curves and complex shapes in leather requires precision and care. Use a craft knife or curved scissors for intricate cuts. Trace the pattern onto the leather with a pencil for accuracy. Cut slowly, following the pattern’s curves. For tight angles, make small, controlled cuts. Smooth edges with fine-grit sandpaper. Use a leather mallet to crease folds without tearing. Patience is key to achieving clean, professional results for your printable leather wallet pattern.
Tips for Avoiding Common Cutting Mistakes
- Always trace the pattern onto leather before cutting to ensure accuracy.
- Use sharp tools to prevent uneven cuts and tearing.
- Cut slowly and follow the pattern closely to avoid deviations.
- Double-check measurements to confirm alignment and proportions.
- Use a cutting mat or protective surface to prevent damage to your work area.
- Apply steady, even pressure to maintain control while cutting curves or straight lines.
Assembling the Wallet
Assembling the wallet involves carefully aligning and securing the leather pieces together, ensuring precise stitching for a professional finish. Use clips or clamps to hold pieces in place while sewing by hand or machine, maintaining even tension for a polished look.
Step-by-Step Assembly Guide
Begin by aligning the wallet pieces according to the pattern, ensuring accurate edges. Use clips or clamps to secure the leather, then proceed with hand-stitching or machine sewing. Start with the card slots, folding and stitching them into place. Next, attach the wallet’s sides and back panel, reinforcing seams for durability. Finally, fold and secure the top edge, ensuring a snug closure. Use wax on threads to prevent fraying and burnish edges for a polished finish.
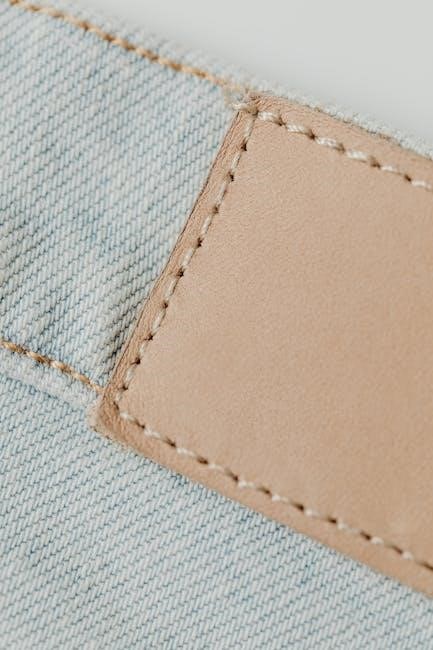
How to Handle Leather Edges
Handling leather edges involves smoothing and finishing for a polished look. Use an edge beveler to trim and round edges, removing excess material. Apply a leather burnishing tool or cloth to create a sleek finish. For added protection, apply leather finishers or conditioners to the edges. This process enhances durability and aesthetics, ensuring a professional appearance. Proper edge handling prevents fraying and extends the wallet’s lifespan, making it more robust and visually appealing.
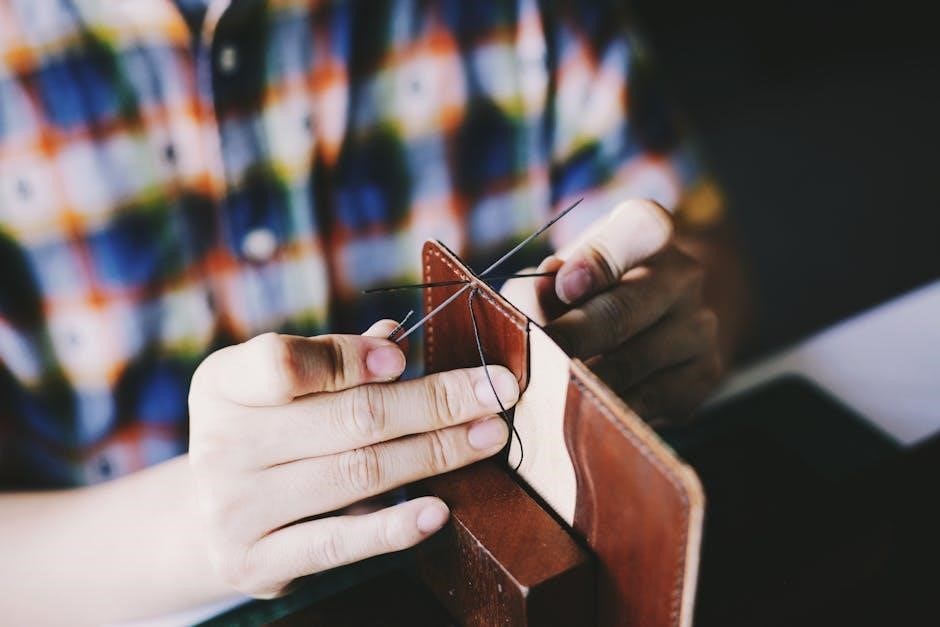
Tips for Sewing Leather by Hand or Machine
For sewing leather, use a heavy-duty needle and waxed thread to prevent breakage. Pre-punch holes for hand-stitching or use a walking foot for machine sewing. Maintain consistent tension to avoid puckering. Apply leather conditioner to keep the material supple. For hand stitching, use a thimble and leather needle, stitching evenly. Machine sewing requires a slow, steady pace. Always test stitches on scrap leather first to ensure proper tension and alignment, ensuring a durable and professional finish.
Customizing Your Leather Wallet
Customize your leather wallet with personalized designs, logos, or unique stitching patterns. Printable PDF patterns allow for creative freedom, ensuring a one-of-a-kind accessory.
Adding Embossing or Stamping
Embossing or stamping adds a personal touch to your leather wallet. Use metal stamps or embossing tools to create monograms, logos, or patterns. Ensure the leather is evenly prepared and stabilized for a clear impression. This technique enhances both functionality and style, making your wallet truly unique. With the right tools and a bit of practice, you can achieve professional-looking results that elevate your DIY project.
Custom Stitching Patterns
Custom stitching patterns allow you to personalize your leather wallet with unique thread designs. From simple straight lines to intricate decorative patterns, stitching enhances both functionality and aesthetics. Use a heavy-duty needle and waxed thread for durability. Pre-punched holes in printable patterns guide precise stitching. Experiment with contrasting thread colors to create visual appeal. Proper tension and alignment ensure a professional finish. This step adds a personal touch, making your wallet stand out while maintaining its structural integrity.
Adding a Logo or Personalized Design
Enhance your leather wallet with a custom logo or personalized design. Use embossing tools, stamps, or laser etching for a professional look. Iron-on transfers or paint can also add unique details. Ensure the design aligns with the pattern before cutting. For intricate logos, consider using a heat press or specialized leather stamps. This step allows you to infuse personal style, making the wallet truly one-of-a-kind. Experiment with placement and techniques to achieve the desired aesthetic.
Finishing Touches
Apply leather finishers for protection and shine. Bevel edges for a smooth feel and burnish for durability. Condition the leather to maintain suppleness and extend its lifespan.
Applying Leather Finishers
Applying leather finishers enhances durability and appearance. Use waterproofing sprays or conditioners to protect the material. Apply evenly with a clean cloth, ensuring full coverage. Allow to dry completely. This step seals the leather, preventing stains and wear. Regular conditioning maintains softness and prevents cracking. For a polished look, buff gently after application. Proper finishing ensures your wallet remains vibrant and functional, withstanding daily use while retaining its premium feel and aesthetic appeal.
Edge Beveling and Burnishing
Edge beveling and burnishing refine the wallet’s edges for a polished look. Use a beveling tool or sharp utility knife to create smooth angles. Burnishing involves rubbing edges with a specialized tool or cloth, applying heat for a glossy finish. This process prevents fraying and enhances durability. For a professional touch, ensure consistent pressure and even strokes. Optional: Apply a leather finisher before burnishing for added protection and shine. This step elevates the wallet’s quality and aesthetic appeal, ensuring long-lasting durability and a sleek appearance.
Conditioning the Leather
Conditioning the leather ensures softness and durability. Use a high-quality leather conditioner, applying it evenly with a clean cloth. Allow it to dry before buffing for a natural sheen. Regular conditioning prevents cracking and fading, maintaining the wallet’s appearance. Avoid over-conditioning, as it may leave residue. For best results, use products suitable for your leather type. This step enhances the leather’s suppleness and protects it from wear, ensuring a long-lasting, professional finish for your handmade wallet.

Troubleshooting Common Issues
Common issues include misaligned cuts, uneven stitching, or pattern scaling errors. Check measurements, ensure proper tool alignment, and verify printer settings for accurate results. Addressing these early prevents wasted materials and enhances the final product’s quality, ensuring a professional finish for your leather wallet.
Fixing Uneven Cuts
Uneven cuts can ruin a leather wallet’s appearance. To fix them, use fine-grit sandpaper to smooth edges or a leather edge beveler for a professional finish. If cuts are significantly off, recut the pattern carefully, ensuring the blade is sharp and the leather is firmly secured. Prevent future issues by using sharp tools and double-checking alignment before cutting. Addressing uneven cuts early ensures a polished, professional-looking wallet.
- Use sandpaper for minor imperfections.
- Recut if errors are severe.
- Sharpen tools regularly.
Repairing Tears or Holes
Tears or holes in leather wallets can be repaired using leather glue and patches. Apply a small amount of glue to both sides of the tear, press a matching leather patch firmly, and let it dry. For larger damages, reinforce with hand-stitching or a leather needle. Regular conditioning after repair helps restore the leather’s strength and appearance, ensuring the wallet remains durable and functional.
- Use leather glue for minor tears.
- Apply a leather patch for larger holes.
- Reinforce with stitching if needed.
- Condition the leather post-repair.
Adjusting the Fit of the Wallet
To ensure a perfect fit, trim excess leather around edges or resize the pattern slightly. Use a ruler to measure and mark adjustments, then cut carefully. Test the wallet’s fit by inserting cards or cash. If too tight, gently stretch the leather or shave edges. For a looser fit, add a small gusset or adjust stitching. Regular conditioning helps maintain flexibility and prevents cracking over time.
- Trim edges for a snug fit.
- Resize the pattern if needed.
- Test with cards or cash.
- Condition leather for flexibility.
Care and Maintenance
Regularly clean with a soft cloth and mild soap. Apply leather conditioner to maintain suppleness. Store in a cool, dry place to prevent cracking.
How to Clean and Protect the Leather
Gently wipe the wallet with a soft, dry cloth to remove dirt. For deeper cleaning, dampen the cloth with mild soap, avoiding harsh chemicals. Allow the leather to air dry. Apply a leather conditioner or sealant to maintain suppleness and protect against stains. Regular conditioning prevents cracking and extends the wallet’s lifespan. Store the wallet in a cool, dry place, away from direct sunlight, to preserve its quality and appearance over time.
Storing the Wallet Properly
Store your leather wallet in a cool, dry place to prevent moisture damage. Avoid direct sunlight, as it may cause fading. Use a soft cloth bag or box to protect it from dust. Stuffing the wallet with paper can help maintain its shape. Never store it in plastic bags, as this can trap moisture and lead to mold. Clean the wallet before storage to prevent dirt buildup. Proper storage ensures the leather remains supple and the wallet retains its quality over time.
Extending the Lifespan of the Wallet
To extend the lifespan of your leather wallet, regularly condition the leather to maintain its suppleness and prevent cracking. Avoid exposing it to direct sunlight, as this can cause fading or drying. Store the wallet in a cool, dry place when not in use. Avoid overstuffing, as this can stretch the seams. Clean the wallet occasionally with a soft cloth to remove dirt and oils. Applying a leather finisher or protector can also help repel spills and abrasions, ensuring long-lasting durability.
Advanced Techniques
Explore sophisticated designs by incorporating multiple leather types, intricate stitching, and functional elements like card slots or a money clip for a premium finish.
Creating Complex Wallet Designs
Designing intricate wallets involves multi-layered patterns and unique features like card slots, coin pouches, or a money clip. Combine different leather textures and stitching styles for a sophisticated look. Advanced tools like leather cutters or laser engravers can add precision and detail. Experiment with contrasting thread colors or decorative stitching to enhance visual appeal. Ensure functionality by balancing design elements with practical storage solutions. This approach allows for a personalized, high-end wallet that stands out.
Using Multiple Leather Types
Combining different leather types enhances both aesthetics and functionality. Full-grain, top-grain, and suede leathers offer varied textures and durability. Contrast stitching or color-blocking creates visual interest. For a modern look, pair smooth leathers with embossed or textured varieties. Ensure proper alignment and cutting for seamless integration. This technique allows for a unique, personalized wallet design, blending style and practicality while showcasing craftsmanship. Experiment with complementary colors and finishes to achieve a cohesive, high-end appearance.
Incorporating Additional Features
Incorporating additional features into your leather wallet enhances functionality and personalization. Add card slots, RFID-blocking layers, or a money clip for practicality. Include a clear ID window or a zippered pocket for organization. Customizable inserts or removable sections allow for versatility. Embellishments like rivets or magnetic closures add durability and style. These features cater to individual preferences, making the wallet more functional and tailored to specific needs while maintaining a sleek, professional appearance.
Conclusion
Creating a leather wallet with printable patterns is a rewarding DIY project. It combines creativity with practicality, offering a personalized accessory. Try it for a unique, handmade item.
Final Thoughts on Making a Leather Wallet
Creating a leather wallet is a fulfilling DIY project that combines craftsmanship with personal style. Using printable patterns offers precision and customization, allowing you to craft a unique accessory. The process enhances your skills in working with leather, from cutting to finishing. With patience and attention to detail, you can produce a durable, elegant wallet that reflects your creativity. It’s a rewarding experience that encourages experimentation and pride in handmade craftsmanship.
Encouragement to Try the Project
Embark on the rewarding journey of creating your own leather wallet using free printable patterns. This project is perfect for crafters of all skill levels, offering a chance to express creativity and personalize your accessory. With step-by-step guides and accessible materials, you can confidently bring your vision to life. The satisfaction of owning a handmade wallet is unmatched, making this project a fun and fulfilling experience. Start your project today and enjoy the pride of crafting something truly unique!
Resources for Further Learning
Explore tutorials on YouTube and crafting blogs for detailed guides on using printable leather wallet patterns. Websites like Etsy and Pinterest offer inspiration and free PDF templates. Join leather crafting communities on forums and social media for tips and support. Check out online courses on platforms like Udemy or Skillshare for advanced techniques. These resources will help you refine your skills and explore new creative possibilities in leather wallet making.